French Frdays with Dorie

Tuesday, August 31, 2010

Chocolate Espresso Shortcake

I made my first post to this group in September 2008. I could not imagine that there would still be recipes left to select almost two years later, but oh there were! And, finally, faster than I had actually imagined, especially for a day I thought would never come, I was choosing the recipe for this fabulous group.

Because I love, chocolate, coffee and shortbread, I thought there could be no better for selection for me than the Espresso Chocolate Shortbread (found on page 125). As I was looking over my blog, I remembered shortbread was the first recipe selected from the book - and the first throw-back I baked. So, what could be more perfect? Nothing. I loved the simplicity of the ingredient list for this recipe. I loved the ease with which the ingredients came together and ultimately I loved the flavor as well.

I knew that I would be choosing a cookie recipe because I love cookies. Generally easy to pull together and then you have a snacking dessert available to you. I debated a few of the remaining recipes in the side of the plate cookie section, but ultimately was drawn to the one that expressed so many of my loves - coffee - chocolate - shortbread. What could go wrong?

I lined the ingredients up for their beauty shot and set to mixing.
I had minor issues rolling out the dough. The batter is flecked with the small delicious pieces of bittersweet chocolate - chopped by the food processor because I chopped my chocolate - painstakingly by hand earlier and then lost it!

Ultimately, I feel I rolled the dough out too thin, but they worked. My only issue was that sometimes my dough would crack as I was trying to cut neat little squares. Speaking of that, I ask forgiveness in advance - straight lines and I are not the best of friends. It must be like that simple math gene. Mine is just slightly wonky - so despite using a straight-edged ruler, I still have (for the most part) rectangles, not squares.


And, apparently I have also lost my ability to read simple sentences because I misread the section about creating holes with the tines of a fork. Dorie said to prick the dough twice with the tines of a fork, ensuring that the tines completely pierced the dough. I read that to be pierce the dough two times with a fork tine. Not having any single or double-tined forks, I used a bamboo skewer to create two holes in my dough. Not a terminal error by any means, but definitely a stupid one!

None of my stupidity however, impacted these little darlings. They do mix divinely with a cup of coffee. They aren't too bad just by themselves - though they do lead one to desiring a beverage. All in all, I am quite pleased with my selection. A bit of time - but for the most part that is hands-off chilling time. And, the result is fine - very fine.


Esspresso Chocolate Shortbread
Cookies
Makes 32 cookies

I NEVER tire of the satisfying combination of espresso and chocolate and am always pleased when I think of another way to use it. Stirring some instant espresso into a classic shortbread dough and then adding bits of bittersweet chocolate transforms a traditional cookie into a modern treat with an edge.
If you’re new to making shortbread, take a look at the pointers on page 124.

1 tablespoon instant espresso powder
1 tablespoon boiling water2 cups all-purpose flour
4 ounces bittersweet chocolate, finely chopped, or ¾ cup store-bought mini chocolate chips
2 sticks (8 ounces) unsalted butter, at room temperature


2/3 cup confectioners' sugar
1/2 teaspoon pure vanilla extract


Confectioners' sugar, for dusting (optional)
Dissolve the espresso in the boiling water, and set aside to cool to tepid.
Working with a stand mixer, preferably fitted with a paddle attachment, or with a hand mixer in a large bowl, beat the butter and confectioners’ sugar together on medium speed for about 3 minutes, until the mixture is very smooth. Beat in the vanilla and espresso, then reduce the mixer speed to low and add the flour, mixing only until it disappears into the dough. Don’t work the dough much once the flour is incorporated. Fold in the chopped chocolate with a sturdy rubber spatula.
Using the spatula, transfer the soft, sticky dough to a gallon-size zipper-lock plastic bag. Put the bag on a flat surface, leaving the top open, and roll the dough into a 9-x-10½ -inch rectangle that’s ¼ inch thick. As you roll, turn the bag occasionally and lift the plastic from the dough so it doesn’t cause creases. When you get the right size thickness, seal the bag, pressing out as much air as possible, and refrigerate the dough for at least 2 hours, or for up to 2 days.

GETTING READY TO BAKE: Position the racks to divide the oven into thirds and preheat the oven to 325 degrees F. Line two baking sheets with parchment or silicone mats.
Put the plastic bag on a cutting board and slit it open. Turn the firm dough out onto the board and, using a ruler as a guide and a sharp knife cut the dough into 1½-inch squares. Transfer the squares to the baking sheets and carefully prick each one twice with a fork, gently pushing the tines through the cookies until they hit the sheet.
Bake for 18 to 20 minutes, rotating the sheets from top to bottom and front to back at the midway point. The shortbreads will be very pale – they shouldn’t take on much color. Transfer the cookies to a rack.
If you’d like, dust the cookies with confectioners’ sugar while they are still hot. Cool the cookies to room temperature before serving.

Variation: OATMEAL SPICE SHORTBREADS: omit the espresso, boiling water and chopped chocolate. Reduce the flour to 1½ cups, and whisk it together with 2/3 cup old-fashioned oats, ¼ teaspoon ground cinnamon, ½ teaspoon ground ginger, ¼ teaspoon freshly grated nutmeg and 1/8 teaspoon ground cloves. Once the butter and confectioners’ sugar are well beaten, add the vanilla, then the dry ingredients, mixing only until they are incorporated.


I made this variation as well. Mostly because I knew others would and as hostess I felt I should know what they were going to encounter. These mix together as easily as the espresso chocolate does - easier in fact - as there is no chocolate chopping involved.


However, they do not pack quite as much as a flavor punch as the others do. They are all right - certainly not a cookie to turn your back on - but also not one for which to cross the street. I think these might be improved with a simple cinnamon sugar dusting as they go into the oven, but I did not think of that until I after I made them plain.

Monday, August 30, 2010

Oatmeal Breakfast Bread - Make that Muffins

When I saw the instructions calling for a loaf I just wasn't feeling it. So, I decided to do muffins instead. I am so glad I did. This made eight or nine, I've forgotten now, giant Texas-sized jumbo muffins.


The ingredients just whipped together in a heartbeat and they were all standard pantry items.


I baked them for about 26 minutes and they were light and moist with a delicate, delicious strusel topping. I might elect to include nuts in the body of the muffins the next time I bake them or include a few oak flakes in the strusel.


I took them with me to work and they were gobbled up right away. Thanks Natalie for making this wonderful selection. The recipe is posted at Oven Love. But. by now, you really should have purchased the book!

Tuesday, August 24, 2010

Crunchy and Custardy Peach Tart


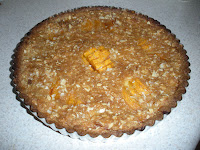
I was actually ahead of the game this week having made this tart a couple of weeks ago. I found the tart shell to be as delicious this time as it was the first time I made it. I could have easily eaten nothing but the shell and been pretty happy.


But, I do love peaches, so adding them to the mix made me very happy. I have gotten peaches a couple of times in the share from my fruit CSA so I had them handy. I felt they were a bit smaller than Dorrie suggested so I used an extra one in the tart. Nevertheless, I still felt their appearance was a bit lacking. They tasted fabulous, but I felt the proportion of custard to peach was too high.


It wasn't that the custard wasn't tasty. As custards go, this one is quite nice. It is not overly eggy and it certainly came together easily. I just prefer more fruit to the custard.


I spread my struesel over the entire top of the tart and have seen in the photos of several others that they limited the spreading to the custard area. That made for a very attractive tart. My custard had sort of taken over the entire pan, so that wasn't a viable option for me, but it is definitely something I am going to try and emulate the next time around.


Rachel of sweet tarte made this very excellent selection for the group - Brava!

Tuesday, August 10, 2010

Chocolate Ganache Ice Cream


Smooth, creamy, decadent - all adjectives I saw on other people's blogs. But, I thought to myself - they won't be applying to your rendition of this treat! Nice to be so wrong, I must say. If I could have an issue with this recipe, I did.


I did not get the custard made yesterday because I found out I had no milk - or rather I had milk, but it had expired about a month ago. I did not even want to open that carton to pour that sludge down the drain, but I did.


So, I was going to go to the store this morning and grab some milk and some more dark chocolate. Then when I awakened this morning I felt like death warmed over and it took me until after 2PM to get myself together enough to face the inferno that has become the norm for our weather this summer. I got back home sometime around 3:30 and started pulling together the recipe.


I was chopping the chocolate while the 3/4 cup of cream heated - no make that - overheated. Do you know how disgusting the stove gets when you boil over heavy cream? No? Lucky you - first of all it stinks and secondly it is difficult to remove from the burner rings.


Second batch, came out just fine. I added it to the whipped eggs slowly and steadily. I then strained this mixture back into the pan to ensure no scrambled eggs were happening. That plan appeared to be successful. However, my custard was very fluffy. I had about two inches of foam atop the custard base. I kept stirring it expecting it to melt down. No, such luck. I finally put a thermometer into the pan because I could not tell if the mixture was thickening.


When it reached the proper temperature I poured it into the ganache. Do you want to know what looks really foul? Scrambled chocolate eggs! What a disaster, this stuff looked so repugnant I almost tossed it down the drain immediately. Instead, I strained it into a new bowl and transferred it to the fridge.


After several hours I checked it - it seemed to be cool - but it did not seem to be smooth. Figuring all I would be wasting was a little electricity and some time, I went ahead and transferred it to the ice cream maker's bowl.


Imagine my shock and delighted surprise when some 30 minutes later I had smooth, creamy, decadent chocolate ganache ice cream! I don't know what I was doing wrong all day to have so many annoying experiences during the ice cream making process, but the end result was worth every annoying second. My friend Debbie is going to love this stuff - she is THE chocolate expert! Thanks for making this choice, Katrina - go to her site - Baking with the Boys for the recipe or of course, you could Buy The Book!

Thursday, August 5, 2010

Junior's Triple Chocolate Cheesecake

A couple of months ago my brother asked me if I could bring my mixer with me and come to his house to make him a cheesecake. He had purchased a copy of the Junior's (from NY) cheesecake cookbook. His reading of the book led him to believe it was best made with a stand mixer and he and his wife do not own one.


I told him that would not be possible as I cannot carry my mixer by myself. However, my sister can move hers and I would ask her to bring it to his house the next time I was up in DE. He considered this for awhile and then decided the best thing to do would be to send me the cookbook and have me make the cheesecake for him when he next time came to Richmond.
I got the book and shortly thereafter saw the recipe he wanted. The man has a serious chocolate habit! Junior's cheesecakes are made on a spongecake base. In this case, the base was a chocolate sponge.

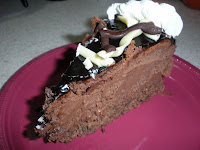
The creamy center is also a chocolate base - 10 ounces of bittersweet chocolate, I might add! My brother was in charge of the chocolate chopping. He is an extremely good chopper. The top of the cake is covered in what Junior's refers to as a fudge mirror and then you make a web of chocolate strips across the top. We used a combination of dark and white chocolate for the webbing. More chopping for the brother! Our web was a little thick due to imprecise cutting of the piping baggie, but nevertheless, I think it looked quite pretty.
This is one massive cake. It says to use a nine inch pan. If you do, it better be at least four inches high. My pan is three inches high and our far cake surpassed that height. Eventually it would be only three inches high, but that was due to an unfortunate incident.
Junior's gives you very precise directions to obtain a perfectly smoothed top cake. I tried to follow those instructions precisely. However, the first oddity I noticed was the sponge itself. I found it to be extremely difficult to blend the chocolate half into the egg whites. I decided not to worry about it and baked the cake. All looked fine, until as the cake cooled it began to pull away from the sides. I knew that meant the bottom of the cake would be a bear to remove from the tray, but you can't fix that midstream.
I then mixed the main batter according to the game plan. All went well, except as I was filling the cake pan, I realized there was a lot of batter. Everything else had been so precise I decided this cake would not rise as most others do. I went ahead and put all the batter into the pan. I have been baking for over 40 years, by now I should know to trust my judgement, but no, I had to listen to the damn recipe. Curses upon my anal little head and its insistence to follow a recipe exactly on the first go-round.

Sure enough as the cake baked it began to rise far above the heights of the pan's sides. I watched through the window nervously for the batter to collapse over the side and fall into the water bath. It remained stable until the time came to test the cake for doneness. I gave it the Junior's test and it appeared to be baked.

Hah! Not so much. As I tried to remove the pan from the water bath without soaking my pot holders I tipped the pan - the layer of batter that had come over the top of the pan was in fact nicely baked. Unfortunately some two inches of it below the pan's sides were still molten liquid chocolate. Slosh over the side and into the water bath - thank God for the water bath - it captured the overflow. It looked disgusting, but at least the mess was contained.

I was quite dismayed about what this was going to do to our smooth cake, but felt I had no choice but to reinsert the cake into the oven. I sent it back to Hades for I believe another 20 minutes or so. With the mess the edges were now in, I knew that removing this cake from the pan was not going to be pleasant. In fact, it was not as horrible as I feared. There was a slight crust formed around the very top edge and I had to do some creative carving to get the cake to release, but overall it came out pretty nicely. The top had a slight indentation, but nothing a little swirl of whipped cream wouldn't cover. The indentation made application of the chocolate mirror slightly difficult, but considering the cavern I expected it was not too daunting.


We let the cake chill appropriately and then we cut into it. As you can see the slices looked quite delectable. Even I, who can chow down on an excessively rich dessert with the best of them, did not want a large slice of this cake. My brother gifted me with the cookbook because as he said, you'll be the one baking them for me! So, now I have this little gem in my hands. I told him I would be happy to make additional cakes for him, but I am not making the same cake every time he comes to visit. Then again, this is the first time he's been down in years, so who knows, maybe by his next visit I will be ready to try and defy death by chocolate once again!

Obviously the next time I bake a Junior's cake I will listen to my instincts and not overfill the pan. I think I will also use my own sponge cake recipe as I found theirs to be a tad dry. I'll do theirs one more time to ensure I did not mix it improperly, but it was much more time consuming than my old stand-by from the Good Housekeeping Illustrated Cookbook.

I also love that the Junior's cookbook has recipes for individual cakes, made in muffin tins, so I am going to try for them the next time. It will make sending home the extras so easy.

Tuesday, August 3, 2010

Gingered Carrot Cookies


Whipped these cookies up after I got home from work today. What an easy recipe to pull together. I agree with Paula, these are nothing like mini-carrot cakes. They are delicious but very different from a carrot cake.

I would not have said they were especially scone-like, but I can't come up with an alternative suggestion, either. I think they are far lighter in texture than the average scone - even my home made scones tend to be a bit drier than these are. I do love scones and make them often. I think my best description would be a cross between the texture of a scone and cake - a cake with the texture say of pound cake.

I quite like the taste - not exactly savory - but definitely not overly sweet. I prefer rich desserts to sweet ones, so that totally works for me. I got 36 cookies - I could have easily made them smaller and gotten closer to 60, but they are not gigantors - just a good size. Also I found them to be exactly as trustworthy as Dorie said - no massive spreading, so I could bake more on one sheet than I normally do.

Over all, an excellent choice by Natalia, she has posted the recipe here. Natlia - congratulations on the new job, it sounds so interesting.
Hah, almost forgot, you know I skipped the coconut, we don't need to keep beating that poor dead horse! I subbed about 1/2 cup of sunflower seeds for the missing coconut and added a few more nuts to as well. I used untoasted walnuts in these because I left them lying on the counter after baking last week and I was too darn lazy to get out the pecans! Of course, you already knew I was lazy the nuts were on the counter for a week!